Installing artificial grass is one of the most effective ways to transform an outdoor space with minimal long-term maintenance. While the process is very achievable for a confident DIYer, the quality of the finished lawn depends far more on the preparation beneath the surface than the grass itself.
Think of it like laying the foundations for a house - if the base is solid, level, and well-drained, the final result will look better, feel better underfoot, and last for many years.
This guide takes you through the full process in a practical, real-world order, with tips used by professional installers to help you avoid the most common mistakes.
Tools & Materials You'll Need
Before you start, it's worth gathering everything in advance so the installation can be completed in one smooth process. Once the base is prepared, you don't want to pause halfway through because a key tool is missing.
Most of the equipment is standard DIY gear, and anything larger - such as a plate compactor - can usually be hired for a day at low cost.
- Artificial grass
- MOT Type 1 / crushed stone sub-base
- Sharp sand or granite (grano) dust
- Weed membrane
- Joining tape & adhesive (if a join is required)
- Galvanised nails or landscaping pins
- Sharp utility knife (Stanley knife)
- Plate compactor (wacker plate), or a manual wacker plate if a small area
- Stiff broom or power brush
- Spirit level
- Wheelbarrow & shovel
Step 1: Measure and Plan the Area
Good planning makes the entire installation easier and reduces waste.
Start by measuring the full area at its widest and longest points rather than just estimating the square meterage. Artificial grass is supplied in fixed roll widths, so these measurements help you choose the most efficient layout and avoid unnecessary joins.
It's also important to think about which direction the grass fibres will face. When the pile leans towards your main viewing angle - usually towards the house or seating area - the lawn appears fuller and more natural.
Step 2: Remove Existing Turf or Surface
This is the stage where the real groundwork begins.
If you're working with a natural lawn, all organic material needs to be removed so your new surface sits on a stable, non-rotting foundation. Cutting corners here can lead to sinking, uneven areas, and poor drainage later on.
Take the time to excavate evenly across the whole area, keeping the depth consistent. This ensures your sub-base will be uniform, which is key to a smooth final finish.
For solid surfaces like concrete or paving, the focus shifts from excavation to preparation - making sure the area is clean, level, and able to drain water away.
Step 3: Install the Sub-Base
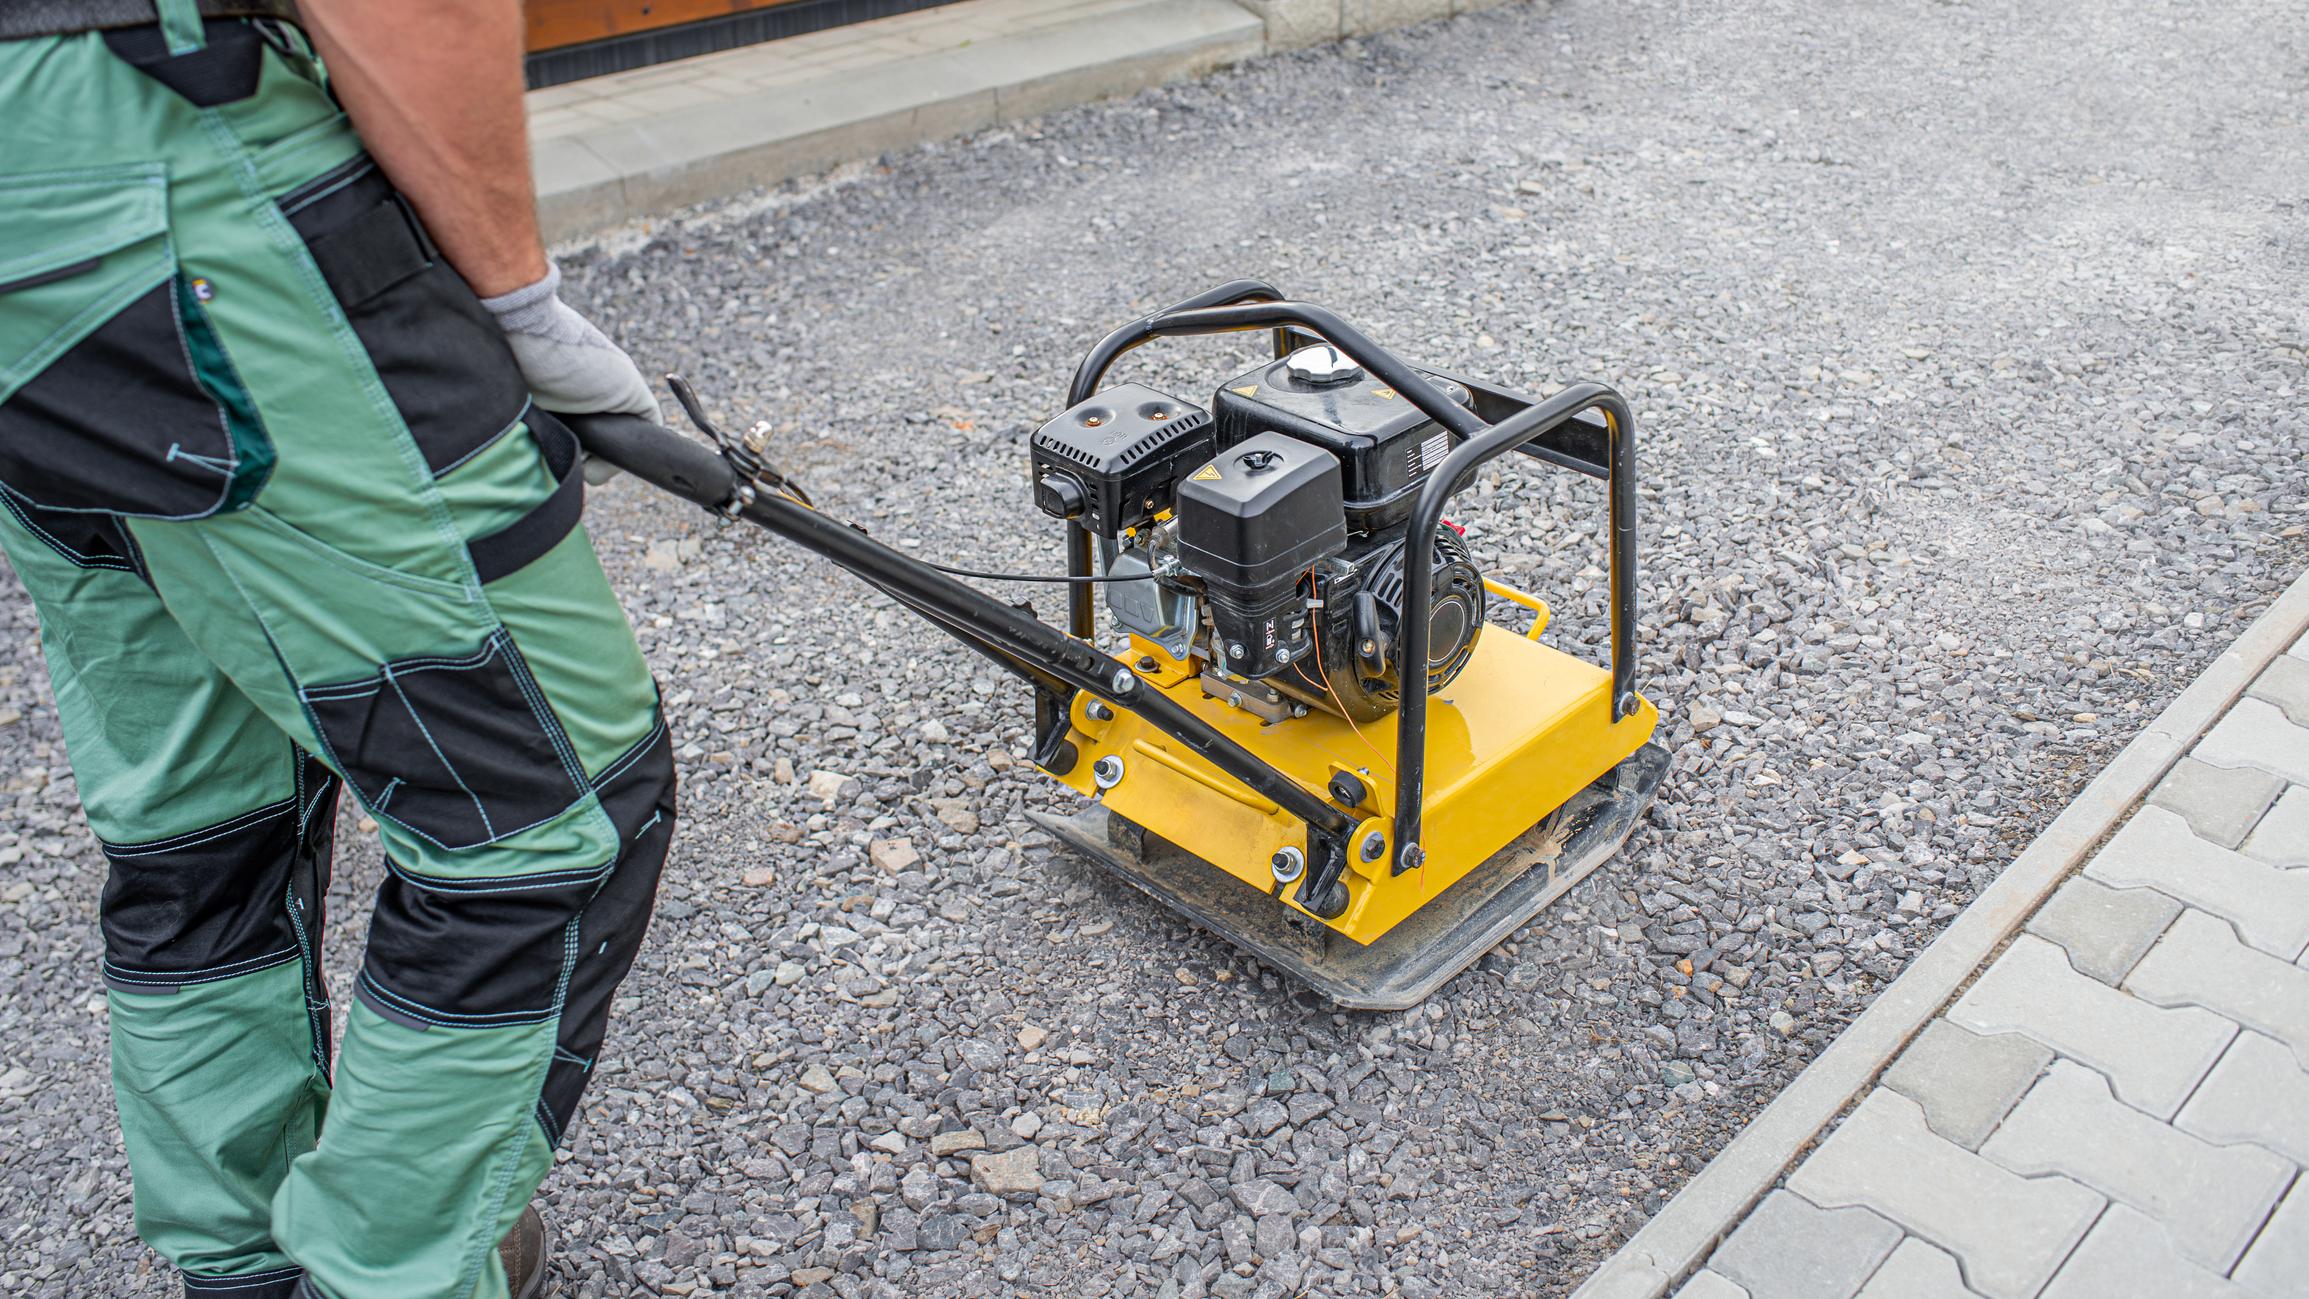
The sub-base is what gives artificial grass its strength and longevity.
Without it, the surface can feel soft, develop dips, and hold water after rain. With it, your lawn will feel firm, drain properly, and stay level even in high-traffic areas.
This layer is built up gradually - first the compacted stone for strength, then the finer top layer to create a perfectly smooth laying course. Each layer should be compacted thoroughly before moving on, as this prevents movement over time.
Step 4: Lay the Weed Membrane
At this point, the area will already look like a finished base, and the membrane acts as a protective barrier that keeps it that way.
It stops weeds from growing up through the lawn while still allowing water to pass through freely. Taking a few extra minutes to overlap and pin it securely prevents movement during the rest of the installation.
Step 5: Roll Out the Artificial Grass
This is the stage where the transformation really becomes visible.
Once the grass is rolled out across the prepared base, you'll start to see the final shape of your lawn. Leave it to settle for a short time before cutting - this helps remove any tension from the roll and makes trimming more accurate.
Always double-check the pile direction before making any cuts, especially if you're working with more than one piece.
Step 6: Cutting and Trimming
Cutting artificial grass is more about patience than strength.
Working from the backing allows you to follow the stitch lines and achieve clean, precise edges that sit neatly against borders and paving. Small, careful cuts are far more accurate than trying to remove large sections at once.
This is the stage that really defines how professional the finished installation looks.
Step 7: Joining Two Pieces of Artificial Grass
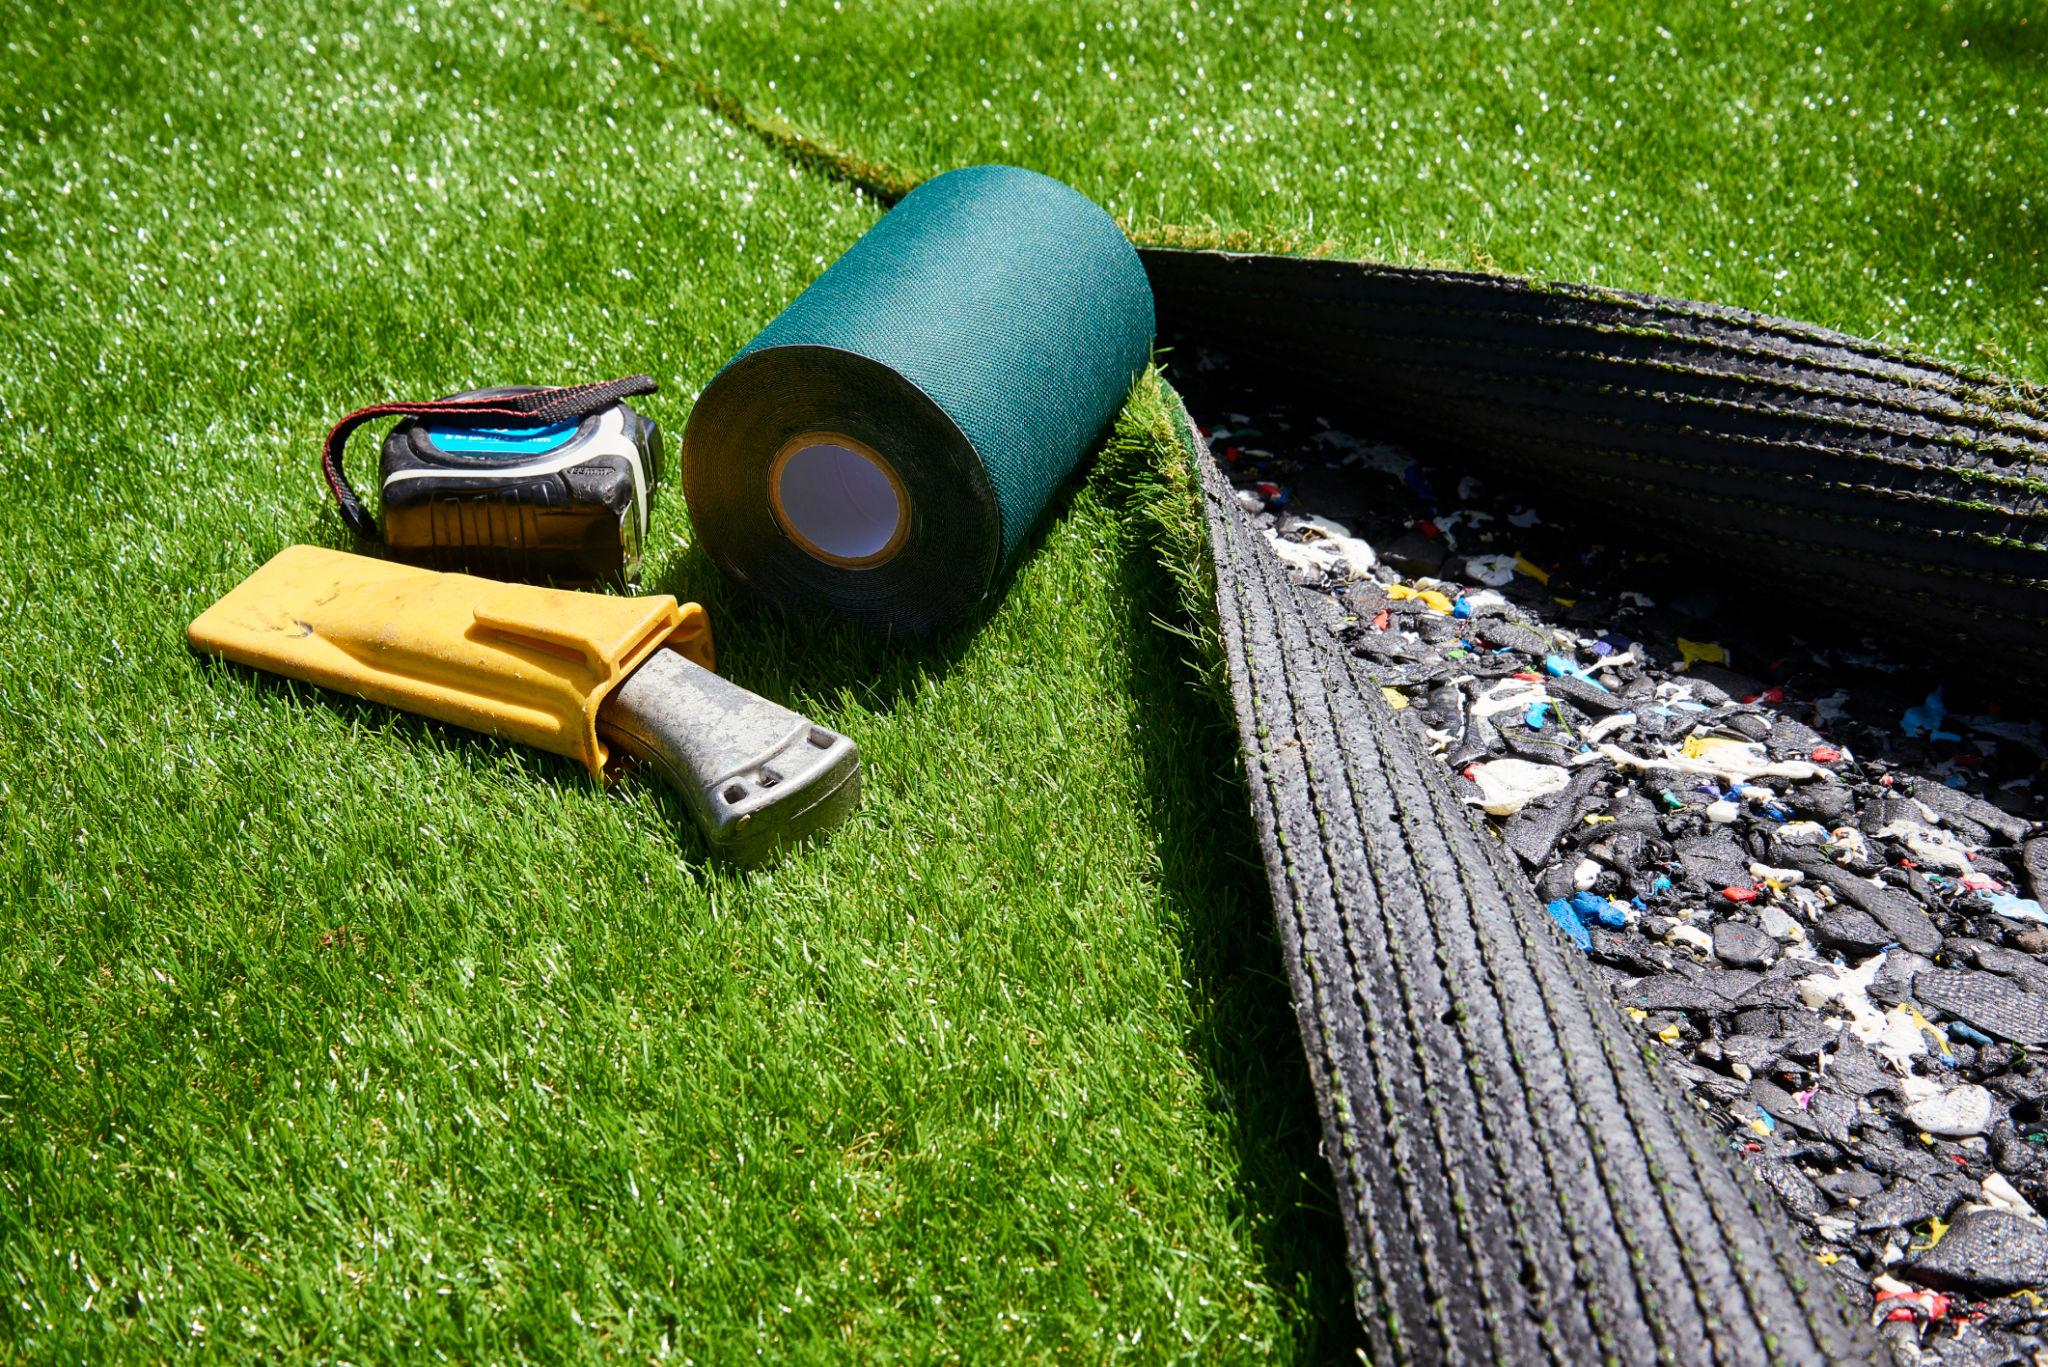
If your space requires a join, don't worry - when done correctly, it will be almost invisible.
The key is taking your time to align the edges so the stitch rows match perfectly before applying adhesive. Once the fibres are brushed up, the seam should disappear into the lawn.
Step 8: Secure the Edges
Fixing the perimeter holds everything in place and prevents movement over time.
Working methodically around the edges keeps the lawn tensioned and smooth. This step also gives the borders a crisp, defined finish.
Step 9: Apply Kiln-Dried Sand (If Recommended)
Not every artificial grass requires an infill, but where it is specified it plays an important role in the performance of the surface.
The added weight improves stability, while brushing the sand into the fibres helps them stand upright and creates a more natural look.
Step 10: Final Brush and Inspection

The final brush is what brings the lawn to life.
By lifting the pile, the grass takes on its full, realistic appearance. It's also the perfect time to walk the area, check for any minor adjustments, and make sure everything feels firm and even underfoot.
Installing Artificial Grass on Different Surfaces
Every installation starts with a slightly different foundation, and understanding how the method changes for each surface helps you plan properly.
Soil or Natural Lawn
This requires the full sub-base build-up to create a stable and free-draining structure.
Concrete or Paving
Here, the focus is on adhesion and smoothing out imperfections rather than excavation.
Decking or Balconies
Comfort and drainage are the priorities, often using an underlay to soften the feel.
How Long Does Installation Take?
For most average-sized gardens, the work is comfortably completed over a weekend. The first day is usually spent on preparation and the second on laying and finishing the grass.
Larger or more complex spaces may take longer, particularly where access is limited.
DIY vs Professional Installation
Many homeowners choose the DIY route and achieve excellent results, particularly in straightforward rectangular gardens.
However, if your space includes slopes, multiple levels, drainage challenges, or complex shapes, a professional installer can often save time and ensure a flawless finish.
Common Mistakes to Avoid
Nearly all artificial grass problems can be traced back to poor preparation.
Taking your time with the base, checking pile direction, and compacting properly will prevent the most common issues and give you a lawn that still looks great years later.
Aftercare for a Newly Installed Artificial Lawn
Once installed, artificial grass needs very little attention - but occasional brushing and light cleaning will keep it looking its best.
A quick routine every few weeks is usually all that's required to maintain that freshly-laid appearance.
Ready to Choose Your Artificial Grass?
Now that you know what's involved in the installation, you can compare products with confidence - looking at pile height, density, backing, and whether an infill is recommended for your intended use.